As a growing family, we reached the point where our garage was completely stuffed with toys, tools, and garden equipment. That’s when we started thinking about building our own DIY storage shed.

We looked at pre-built sheds first, but the ones sold at Home Depot and Lowe’s were too small and too expensive. We wanted something permanent and modern-looking — something that would blend well with our backyard and last a long time.
Doing my homework before the build
Before I started, I did my research. I began by watching Craigslist, Facebook Marketplace, local buy/sell groups, and liquidation stores for materials and supplies. Here’s what I found and where:
- Commercial roofing panels — Facebook Marketplace
- ½” plywood — Facebook Marketplace
- Tyvek housewrap — close-out store sale
- Hardie panels — Facebook Marketplace
- Lumber — Home Depot and Menards (tip: Menards runs 11% rebate promotions from time to time — always fill out the rebate form and mail it in with your receipt)
After looking for ideas and inspiration on YouTube and social media, I drew up a basic plan for the shed. I wanted it easy to build, good-looking, and on budget. The final spec:
- Walls: 2×4 framing
- Roof rafters: 2×8
- Sheathing: ½” plywood on walls and roof
- Siding: Hardie fiber-cement panels paired with Tamlyn aluminum reveal trim
- Trim: white PVC
- Doors: two 7′ garage doors + one 32″ × 7′ entry door
- Roofing: metal panels — long-lasting, easy to install, and a good match for the shallow roof pitch
Starting with the concrete pad
While I was still sourcing materials, I started prepping the concrete pad. I removed 12–13″ of topsoil with a shovel and wheelbarrow, filled it in with ¾” gravel (AB3 road-base rock), and compacted everything with a rented plate compactor.
Next, I built the forms from old lumber I had lying around and tied in ½” rebar.
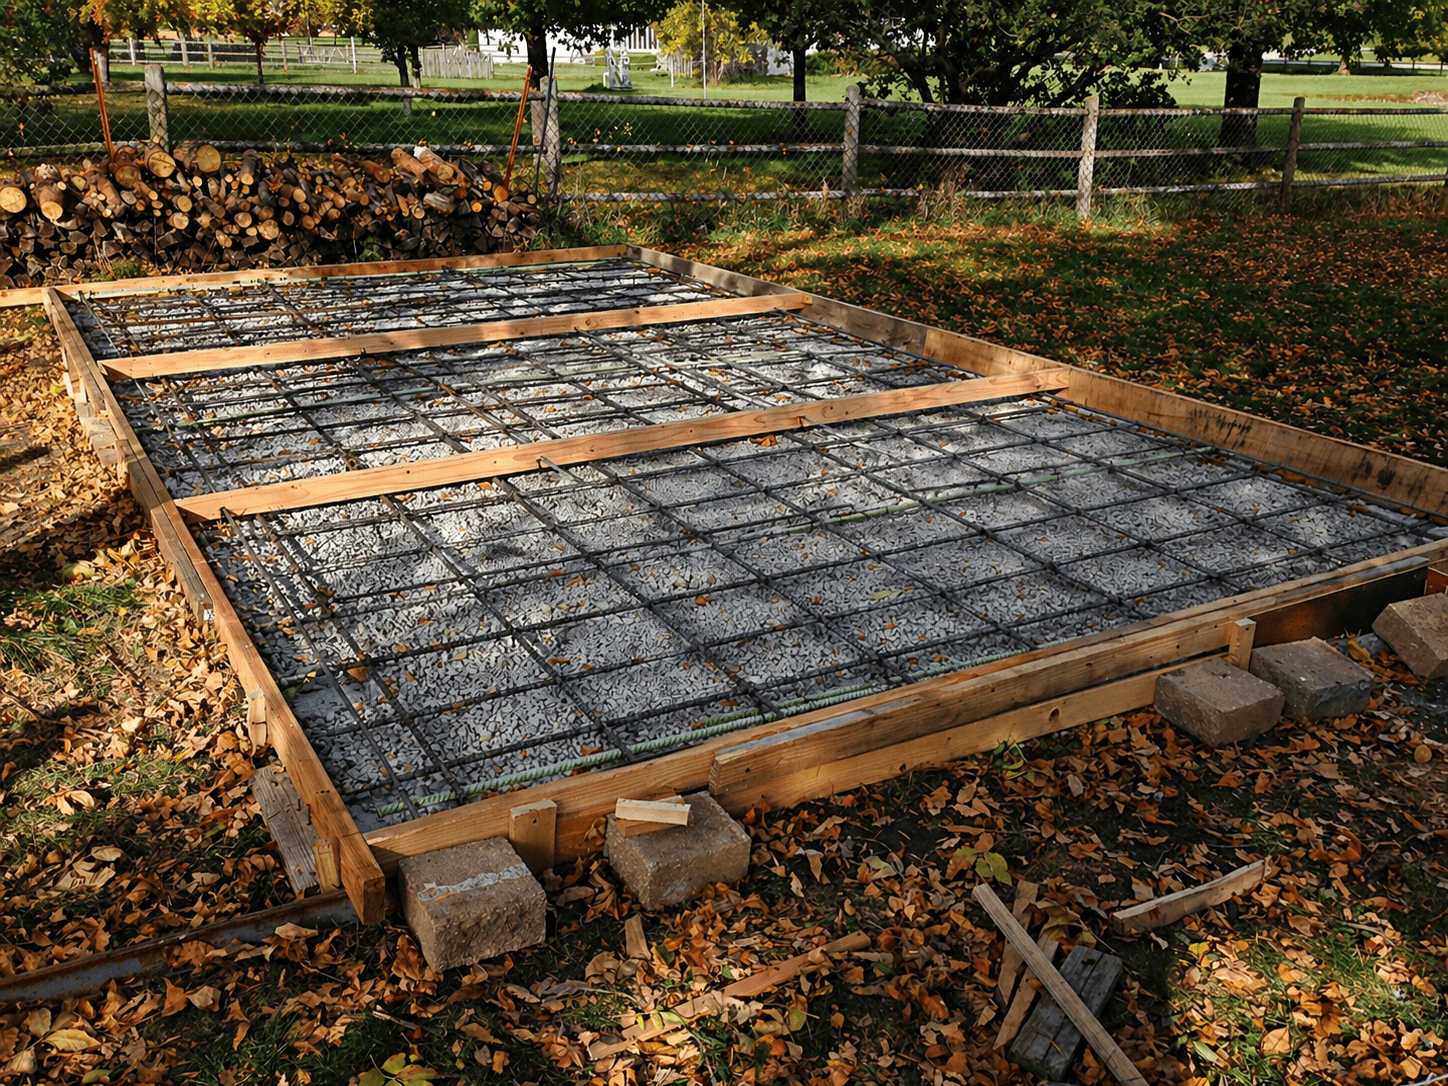
The shed sits in the farthest corner of the property, completely inaccessible to ready-mix trucks or heavy equipment. So I rented a concrete cart/trailer — it holds about 1 yard of ready-mix concrete per load. I ordered three loads for 3 yards total.

Tip: I always buy extra bagged concrete mix from Home Depot as insurance. If I run short, I can drop bags into the cart to finish out the pour. This time I did run short and used an extra 15 bags. Total cost for the 3 yards (three trips) plus rental plus the bagged mix: about $820.
On the first day I poured the two outer sections. I was doing it alone, and by the end I was exhausted — so I completed the middle section the following day. The next morning I applied a cure-and-seal to help the concrete cure properly.

If you take one thing away: get help on concrete pours, especially on a warm day. You don’t have much time to finish, smooth the surface, set the edges, and drop your anchor bolts. I set ½” anchor bolts around the perimeter of the pad while the concrete was still workable.
Framing the walls
While the concrete cured, I started framing the walls. At the time I was working in the automotive business, so I had access to a warehouse with an air compressor, tools, and shelter from the weather. I stayed late after work for three days building all four walls there.
I carefully measured the sill-plate perimeter, made templates, and framed the walls flat on the shop floor. Once built, I stacked them vertically to save space.


The front wall was the tough one — two 7′-wide garage door openings, with headers, at roughly 12.5′ tall. It was heavy and bulky, so I split it into two sections for easier transport.
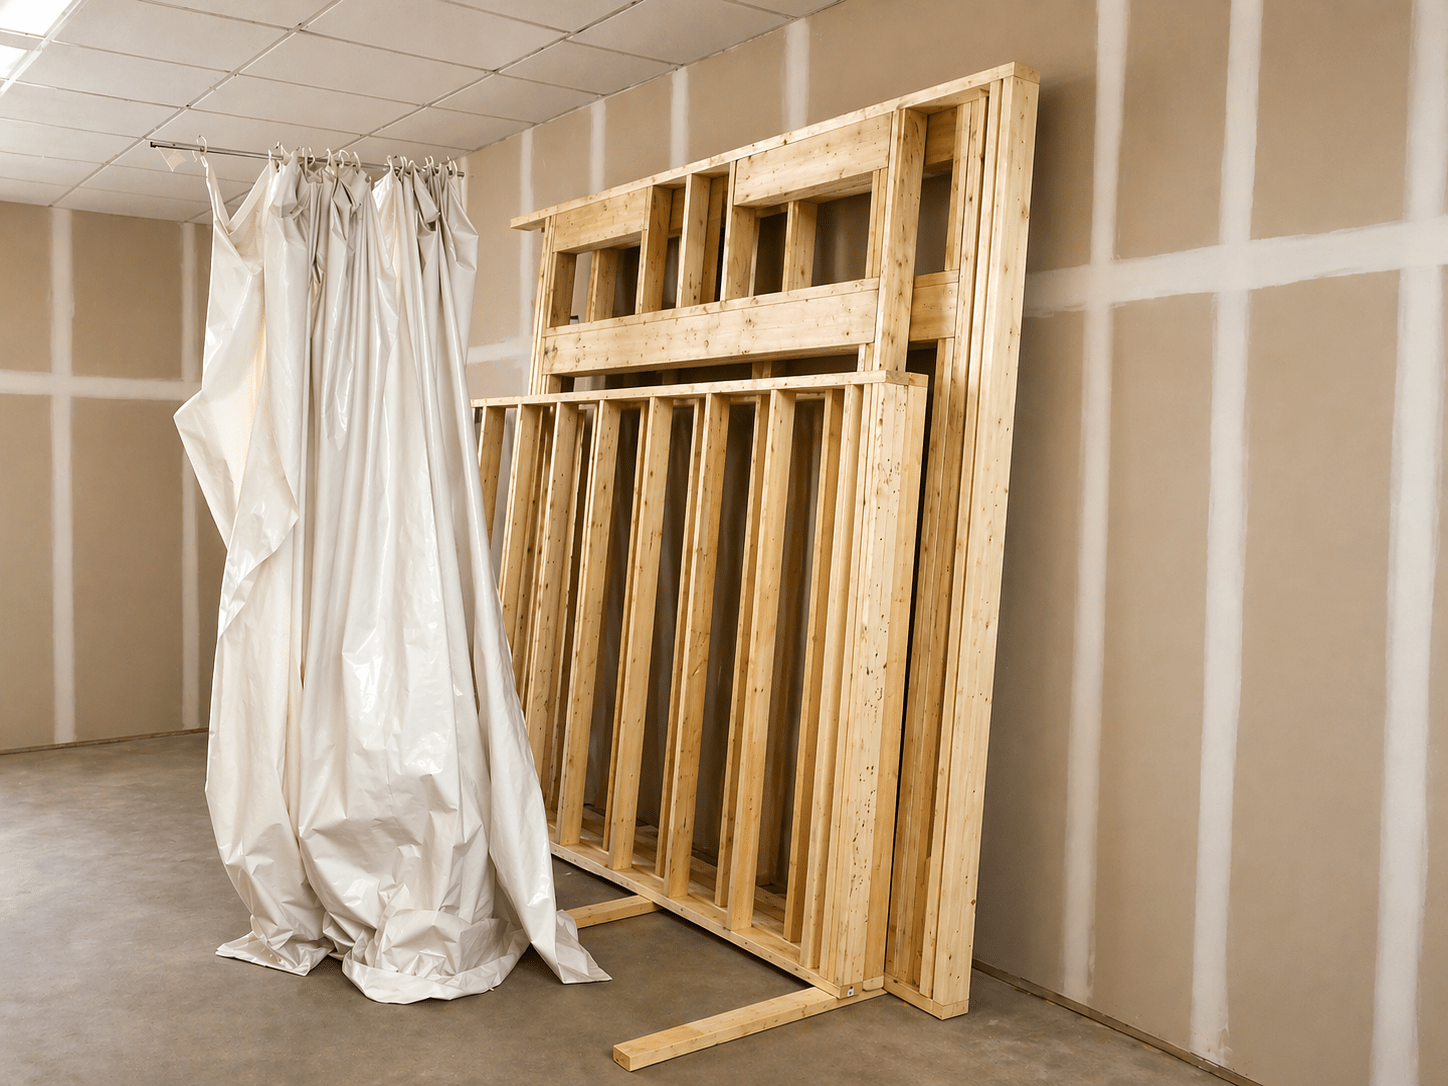
I decided to sheet the walls with plywood at home instead of at the shop — it made them easier to move and lift. After hauling the framed walls home on my flatbed trailer, I laid each one flat on the driveway and nailed on ½” plywood sheathing, keeping every corner square.
Using some leftover exterior latex primer, I rolled a coat onto the exterior face of each wall. It wasn’t strictly necessary, but we were having a rainy fall and I wanted to protect the plywood until I got the roof on.
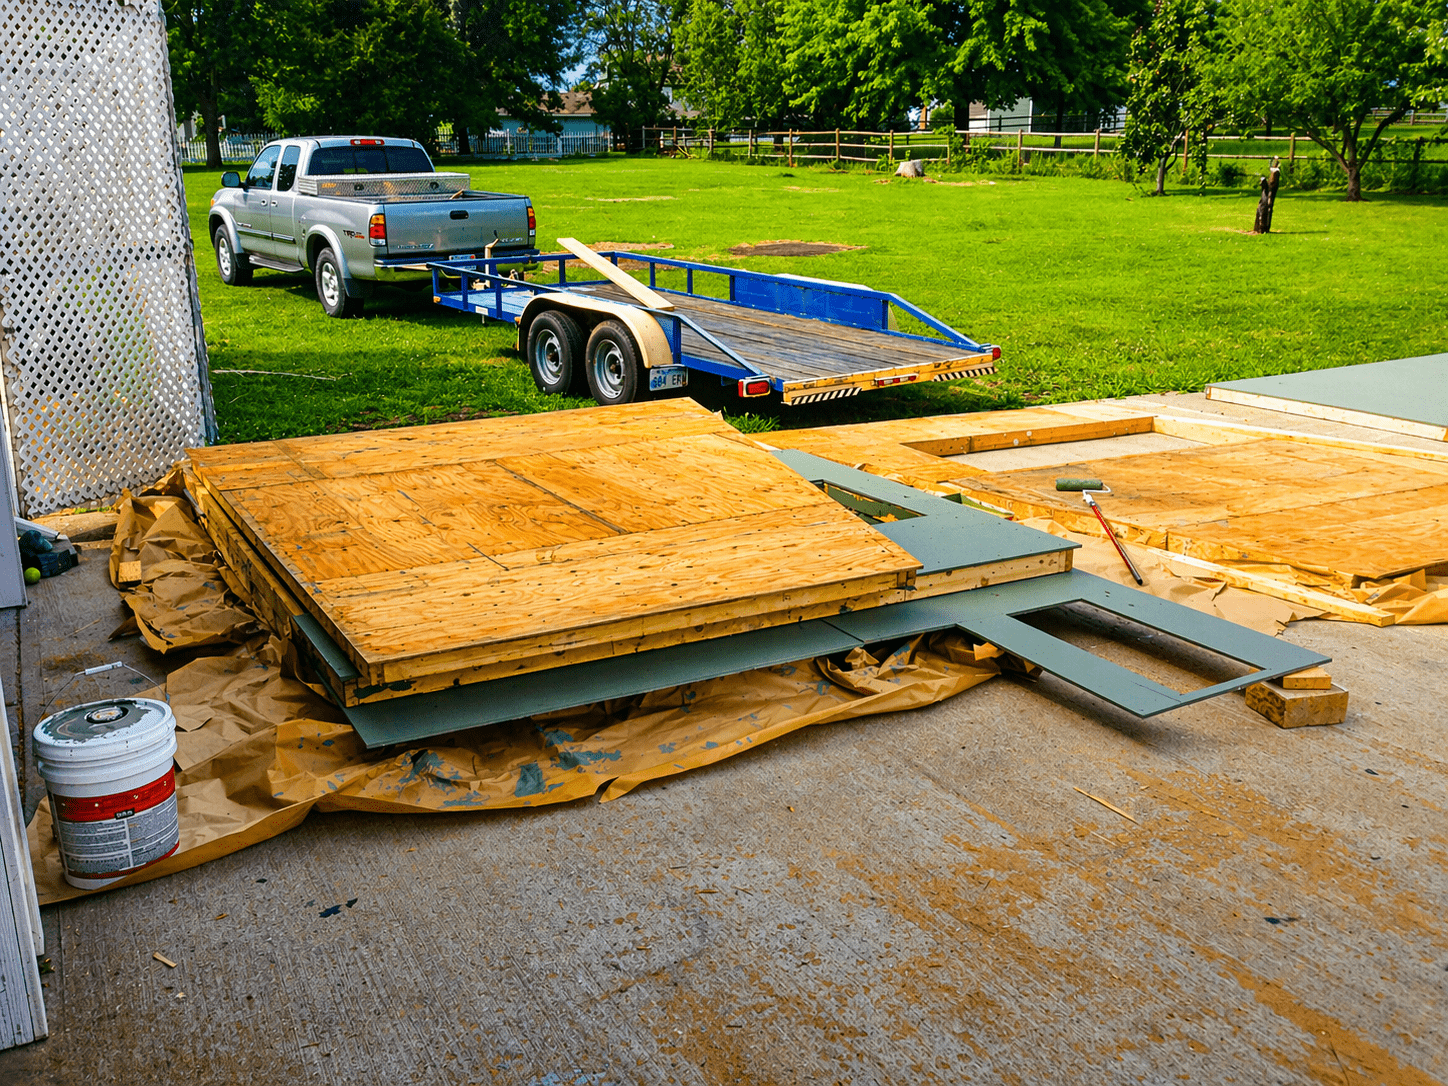
The next day, I loaded the walls back onto the trailer and brought them to the pad.
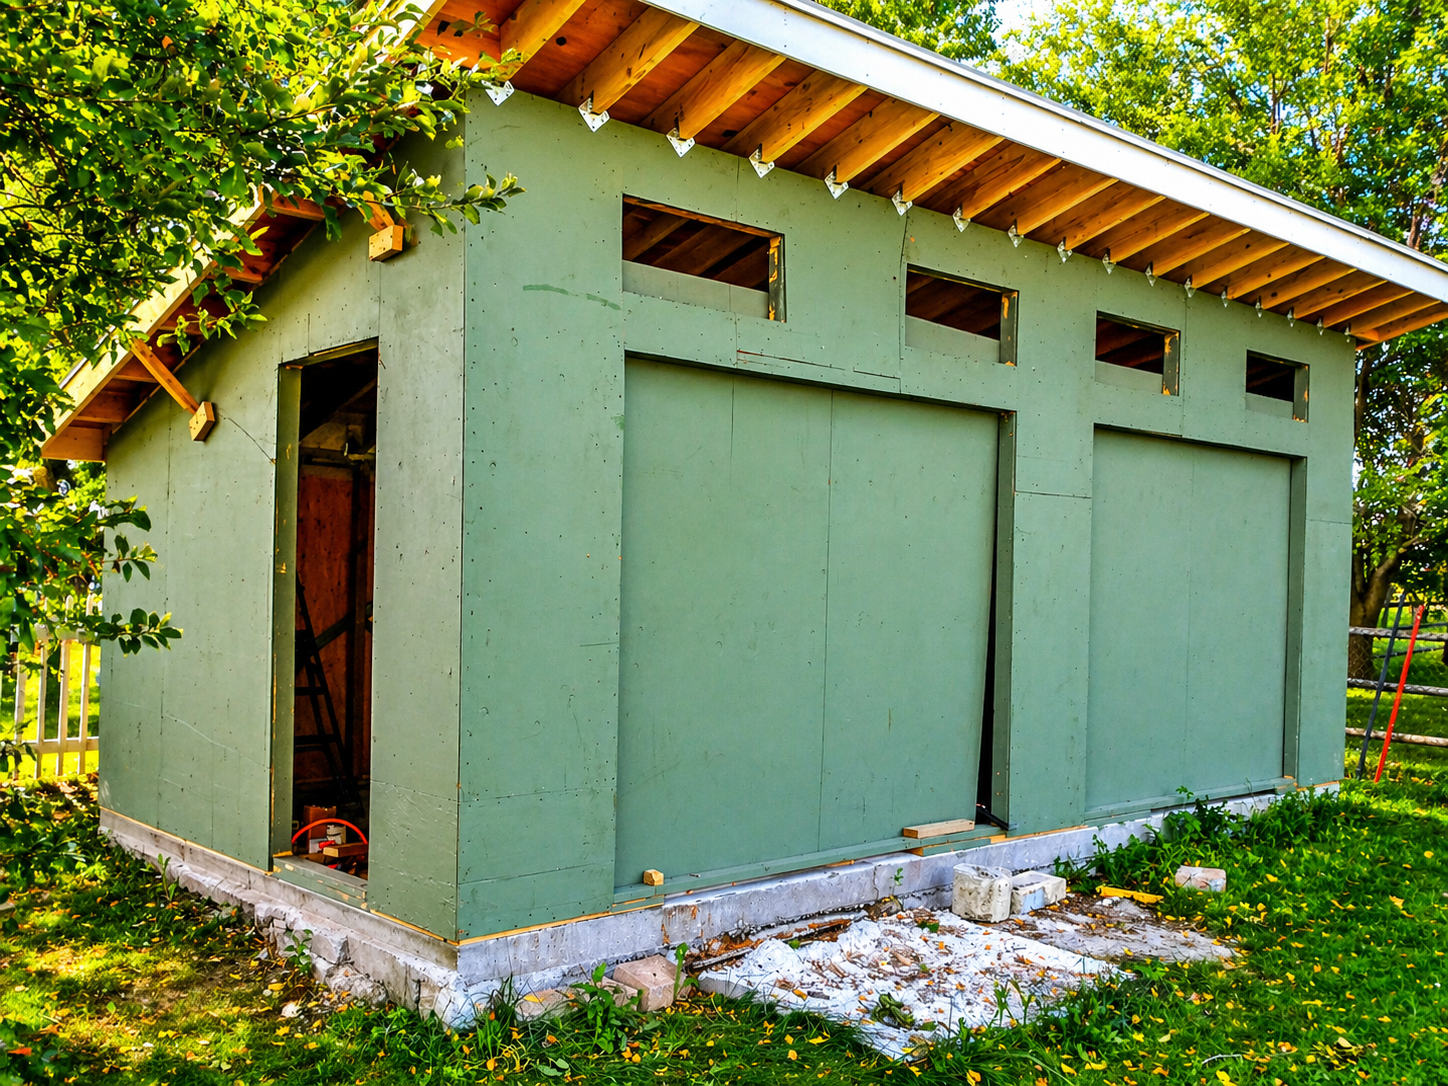
Raising the walls
It took 5.5 hours to unload and stand up all four walls. I needed help here — my wife held the braces while I lifted each wall into position.

One at a time, I raised the walls and nailed them together at the corners. I secured each bottom 2×4 sill plate to the anchor bolts in the pad using a square washer and nut.

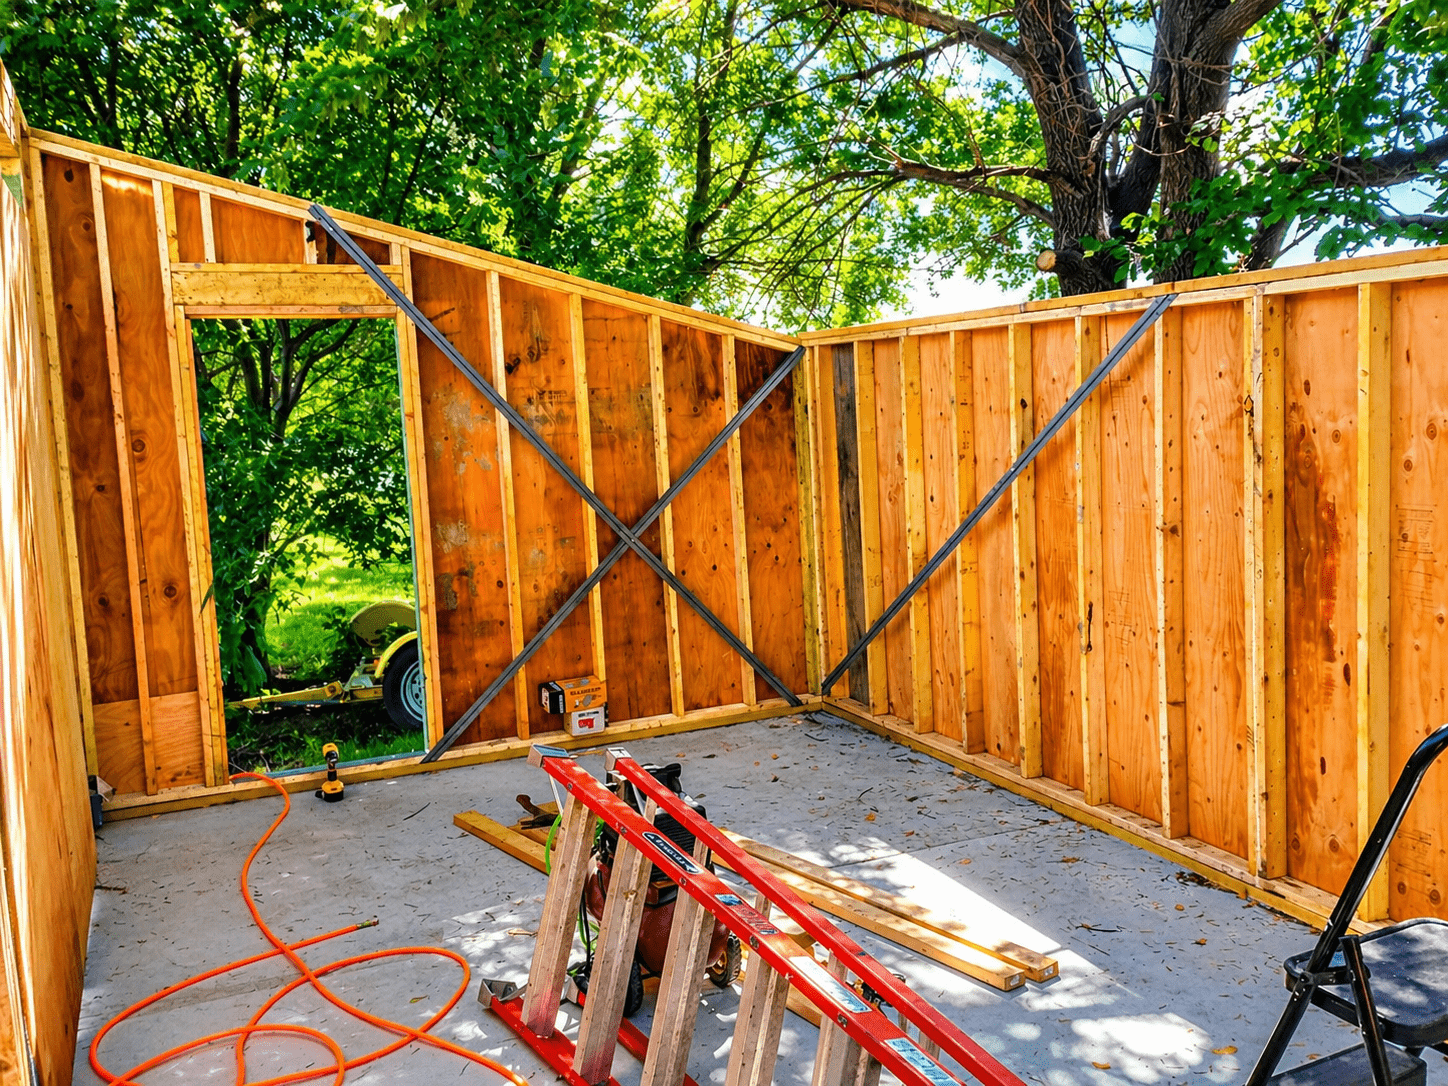
Tip for working solo: I use heavy-duty ratchet straps to pull walls together or align them vertically. Saves you a second set of hands more times than I can count.
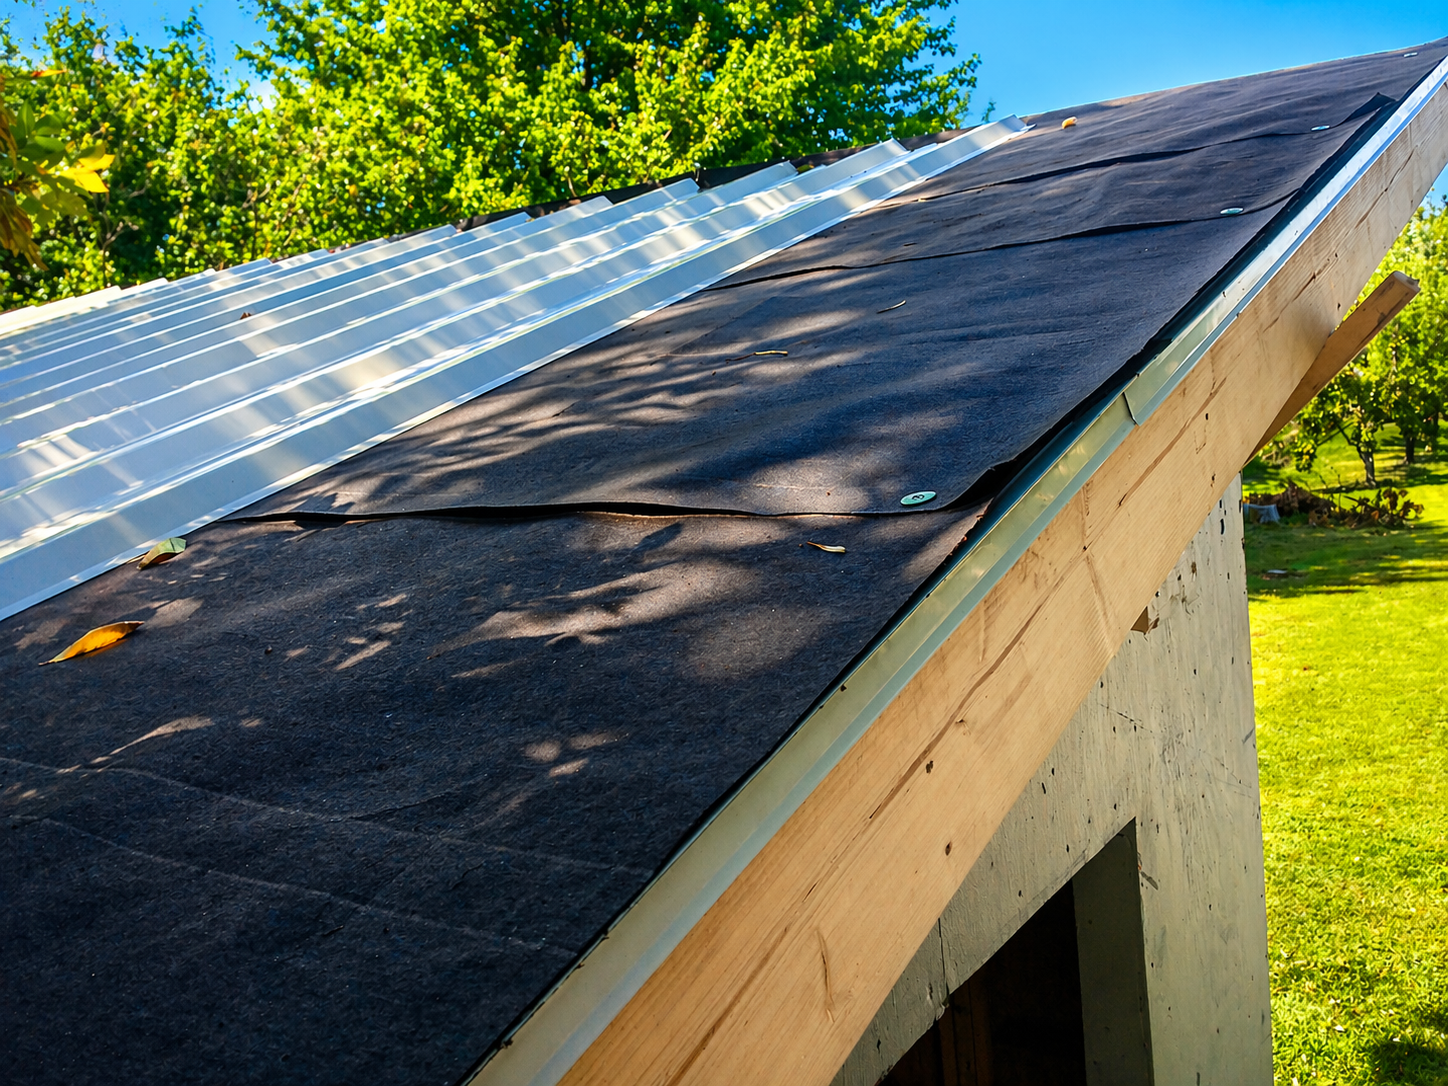
Roof
Roof rafters are 2×8s running between the front and back walls — the front wall is taller, giving the roof a slight pitch for drainage. Every rafter got a hurricane tie before the ½” plywood decking went on. Then roofing felt, then commercial metal roofing screwed down with colored-head screws. White aluminum fascia and PVC trim wrap up the drip edge.
Wall siding and Tamlyn reveals
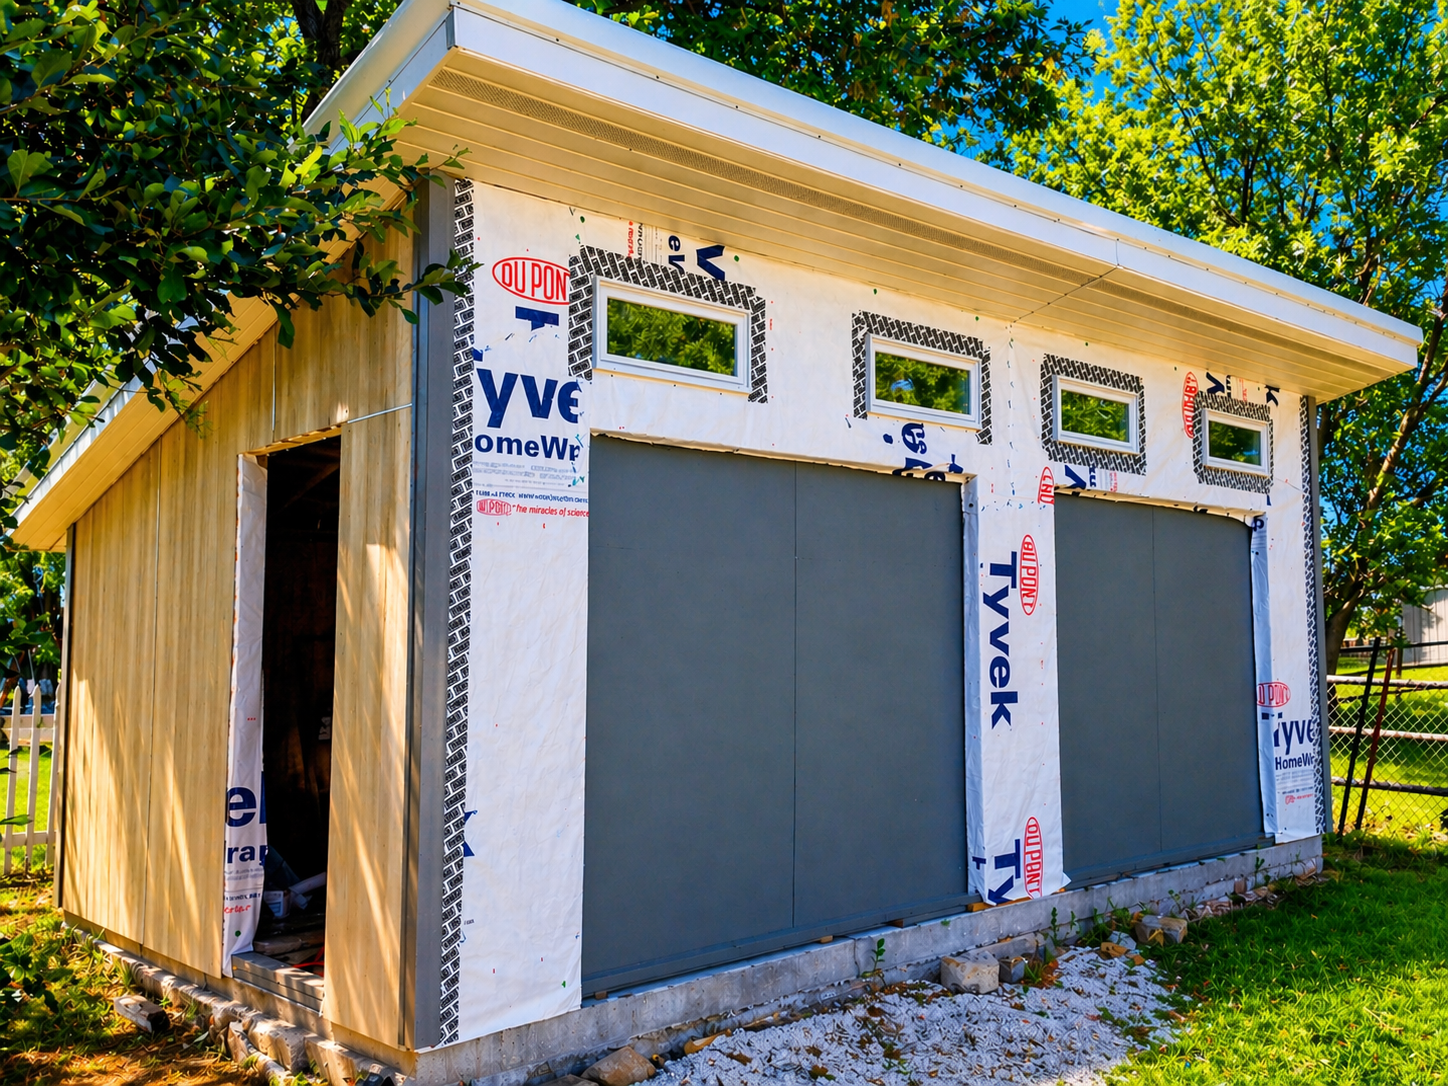
First I wrapped the plywood walls with Tyvek housewrap. I fastened it down with roofing shank nails with plastic caps — not staples. The plastic caps spread the load and seal around the fastener, so the Tyvek doesn’t tear loose in wind and you don’t end up with hundreds of tiny perforations leaking water down the road. I rolled the wrap as tight as I could and kept the cap nails to the minimum needed to hold it flat.
For corners, I used pre-painted vinyl corners from Menards — the same corners used for vinyl siding. They cost a fraction of the Tamlyn corners, which were special-order anyway. Once each corner was screwed to the wall, I taped over the screw side with 3″ flashing tape, slid in the first Hardie panel (leaving a small expansion gap), and nailed it to the wall.
Between panels I used Tamlyn aluminum reveal channels on all horizontal and vertical seams. They ship pre-painted in a grayish-silver powder coat. I cut them with a 4″ angle-grinder cut-off wheel.
My process for each joint:
- Nail the first Hardie panel.
- Slide the reveal channel against the panel and secure it with exterior-grade screws (pre-drilling is a must in most cases).
- Tape the screwed side with 3–4″ wide self-adhesive flashing tape.
- Slide the next panel into the channel.
- Repeat.
I secured Hardie panels with nails into the stud lines — at some spots I used screws too.
Patching tip
After everything was nailed up, I patched all nails and screws. Over the years I’ve tried everything from automotive Bondo to composite patching compounds, and in my opinion DAP Platinum Patch (16 oz) works best — easy to apply, good weather resistance, sands nicely. I get it on Amazon (ASIN: 7079818741).
Small tip: buy the 16-oz cans. Once opened, they dry out and usually aren’t reusable for the next project. The small can matches the scale of most single-project repairs.
Why Tamlyn reveals
I love the quality and finish of Tamlyn’s aluminum reveals. By arranging the channels intentionally — not just on panel seams — you can create a genuinely modern exterior.
Hardie panel tip: buy panels in the smoothest finish available. Hardie sells several texture options, but only the smooth panels slide cleanly into aluminum reveal channels.
Tamlyn trim quality is exceptional. Shipping depends on order size — large orders come palletized via freight; small orders ship UPS in tubes or boxes (I’ve ordered mine in 8′ lengths).
Painting the exterior
After all panels were patched, sanded, and prepped (I also used some paintable silicone on seams), I painted the exterior walls with stucco paint with UV protection.
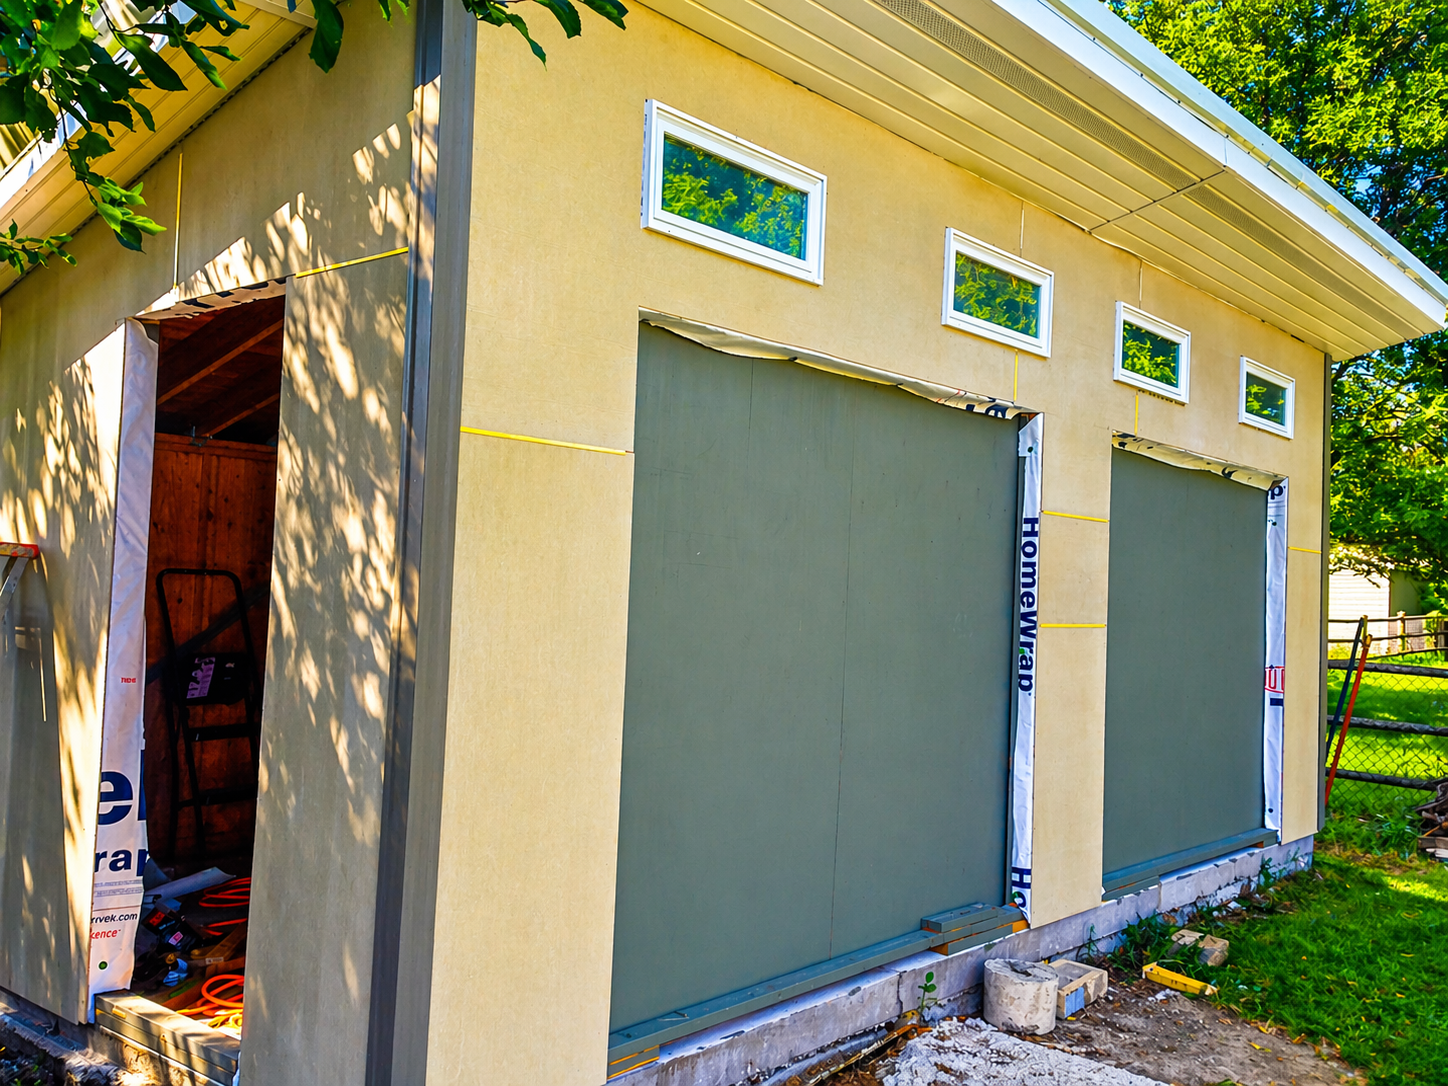
I masked every reveal channel before painting — the reveals stay unpainted, since they come powder-coated in grayish-silver. I used regular painter’s-grade masking tape, the same way you’d mask a car before paint.
Tip: put a wider tape over the channel, then trim the excess with a sharp blade along the channel edge. Cleaner line than trying to lay narrow tape precisely.
Doors
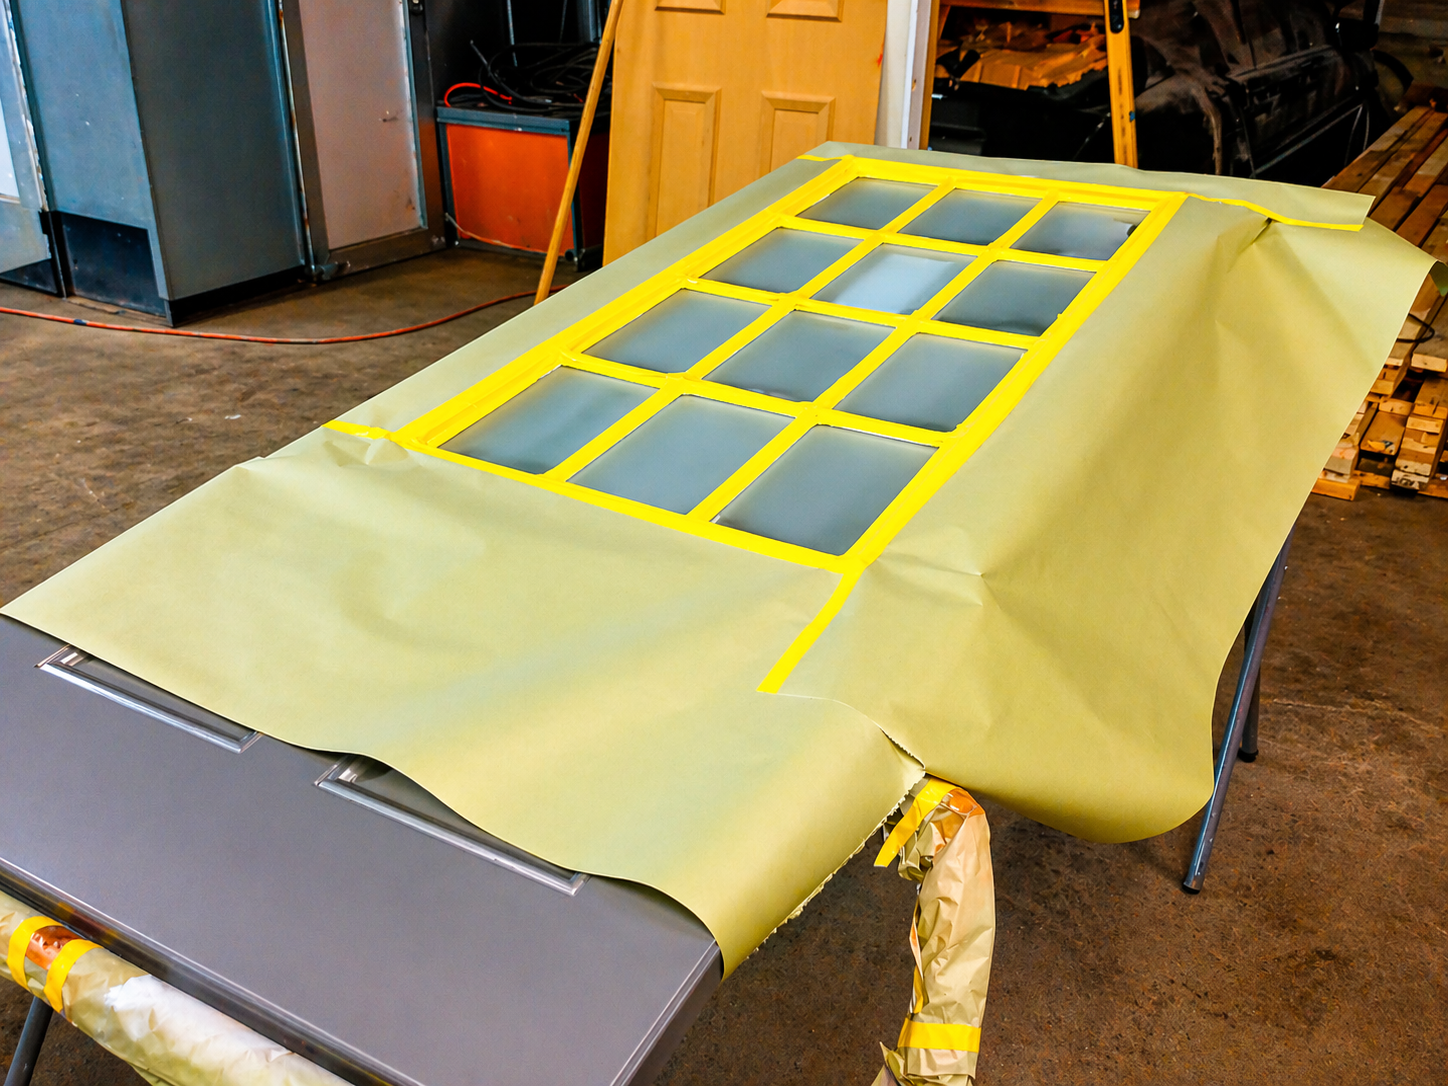
I picked up two Clopay standard garage doors from Home Depot on sale. I sanded them down, primed them, and custom-painted them using an automotive paint system with two full coats of clear. I painted them in a paint booth.
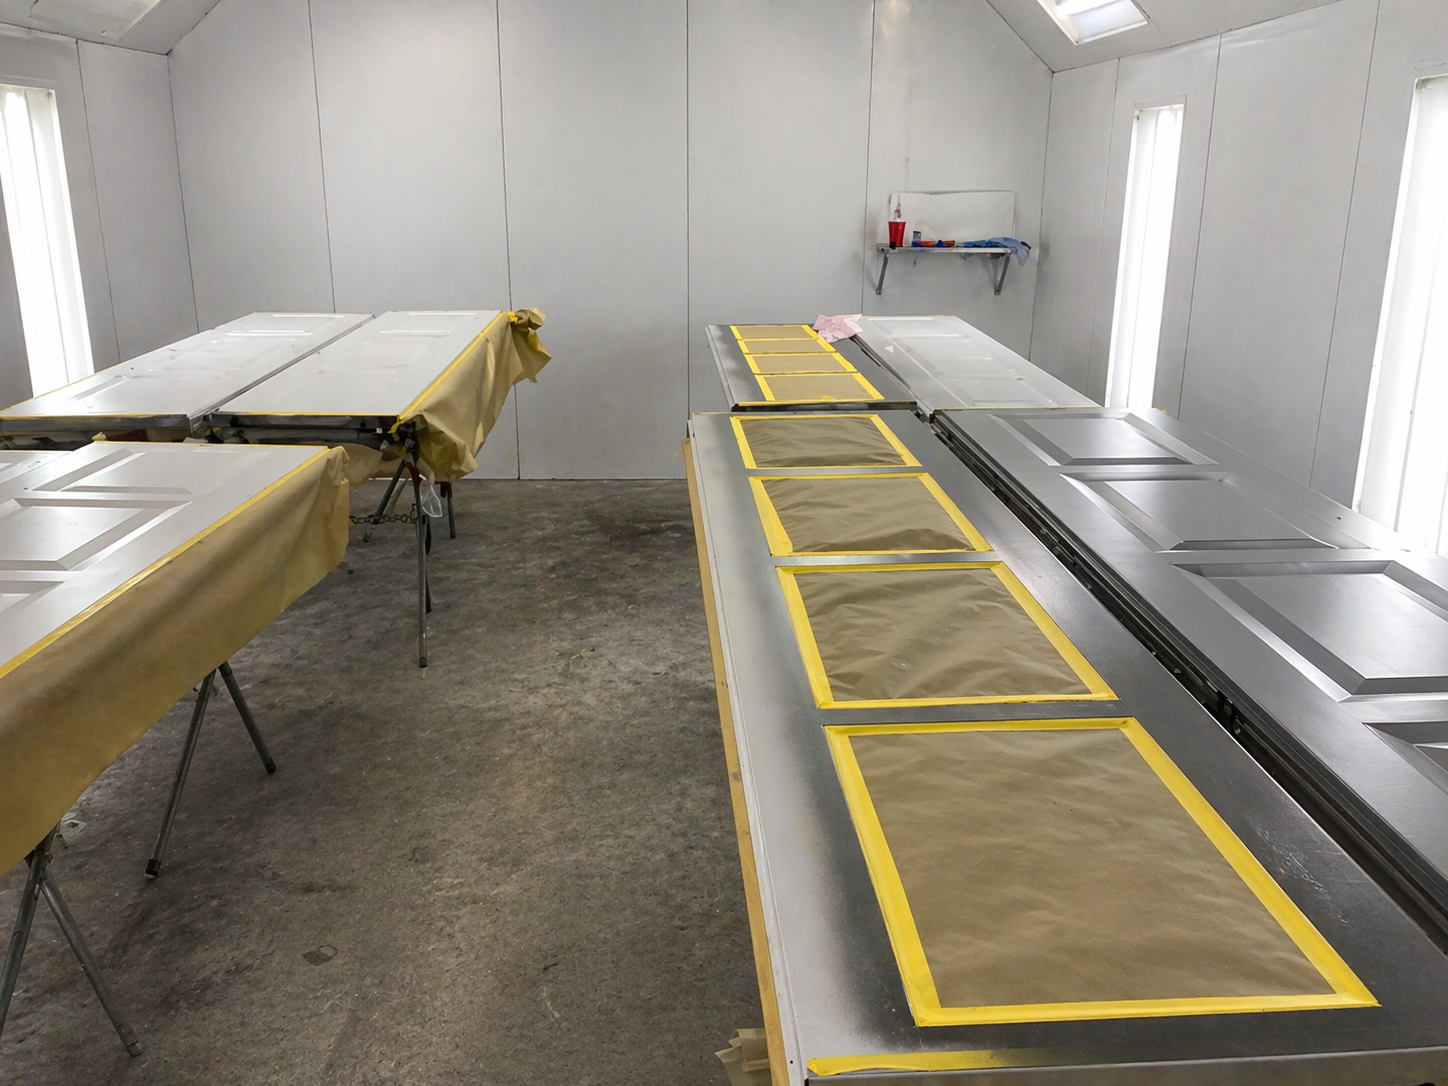
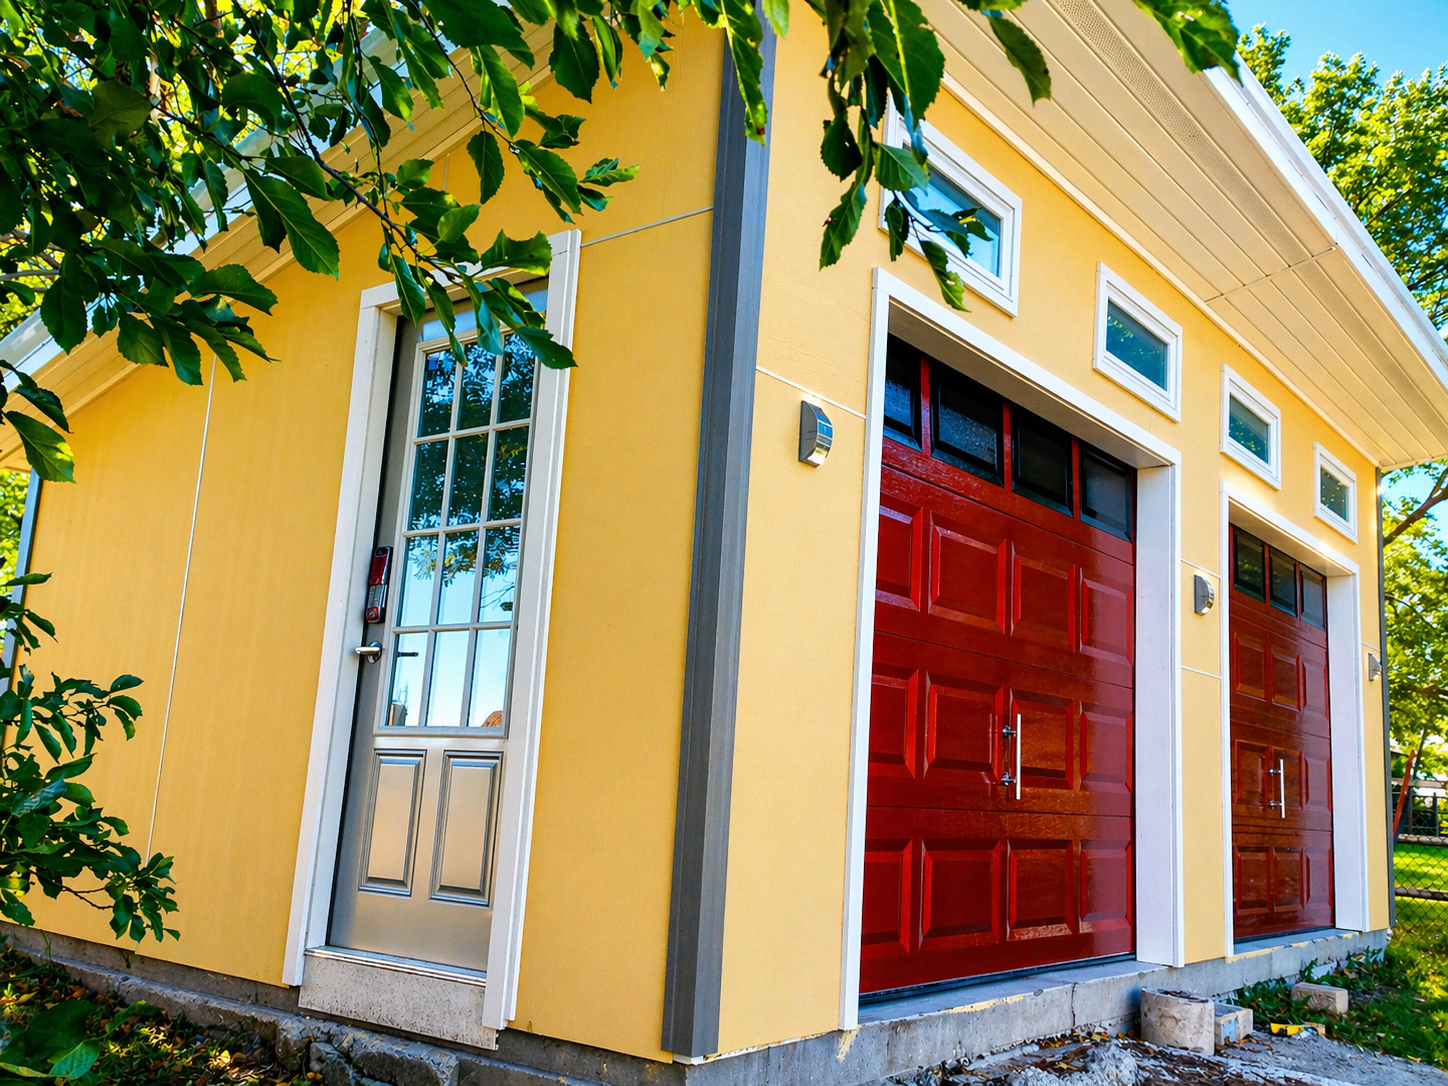
The look I wanted: painted black on the upper window panels first to create a tinted-window effect, then taped those “windows” off and painted the rest of the door panels with leftover automotive paint from a custom hot-rod project — an orange/copper color. The finish came out really clean and unique.
For the side entry door, I installed a 32″ × 7′ door with a clear-glass insert from Home Depot’s clearance section. It was on clearance because of some dents and scratches at the bottom. I fixed the damage and repainted both sides of the door with leftover silver automotive paint.
After the paint dried, I masked the glass and sprayed it with a frost-effect coating for privacy while keeping it translucent. The frost paint came from Amazon (ASIN: B00114LS5A) — one can was enough for the small window, and I sprayed the interior side of the glass.
All exterior trim is PVC boards from Home Depot — easy to cut, easy to install, and they last forever. I used small trim nails in my Metabo finish nailer.
Covering the interior walls
When the exterior was done, I originally planned to leave the interior walls as exposed 2×4 studs. But I came across some commercial 4′ × 10′ wall sheets on deep discount — thin, but with a decent wood-grain pattern (linoleum-based). Couldn’t pass on the price.
I nailed them to the studs with finish nails — just enough coverage to hide the framing. They felt a little flimsy, so I treated them as cosmetic only. Most of them ended up behind shelves and storage racks anyway.
Final cost and takeaway
It took me 30 days — late nights after work and weekends — to build the shed myself. The total cost of the project came to $5,500 back when we built it about ten years ago. Material prices have climbed a lot since then, so the same build today would likely run closer to $8,000–$9,000 — but the savings strategy still works.
We saved a lot by sourcing through local marketplaces, Facebook groups, clearance aisles, and discount stores.
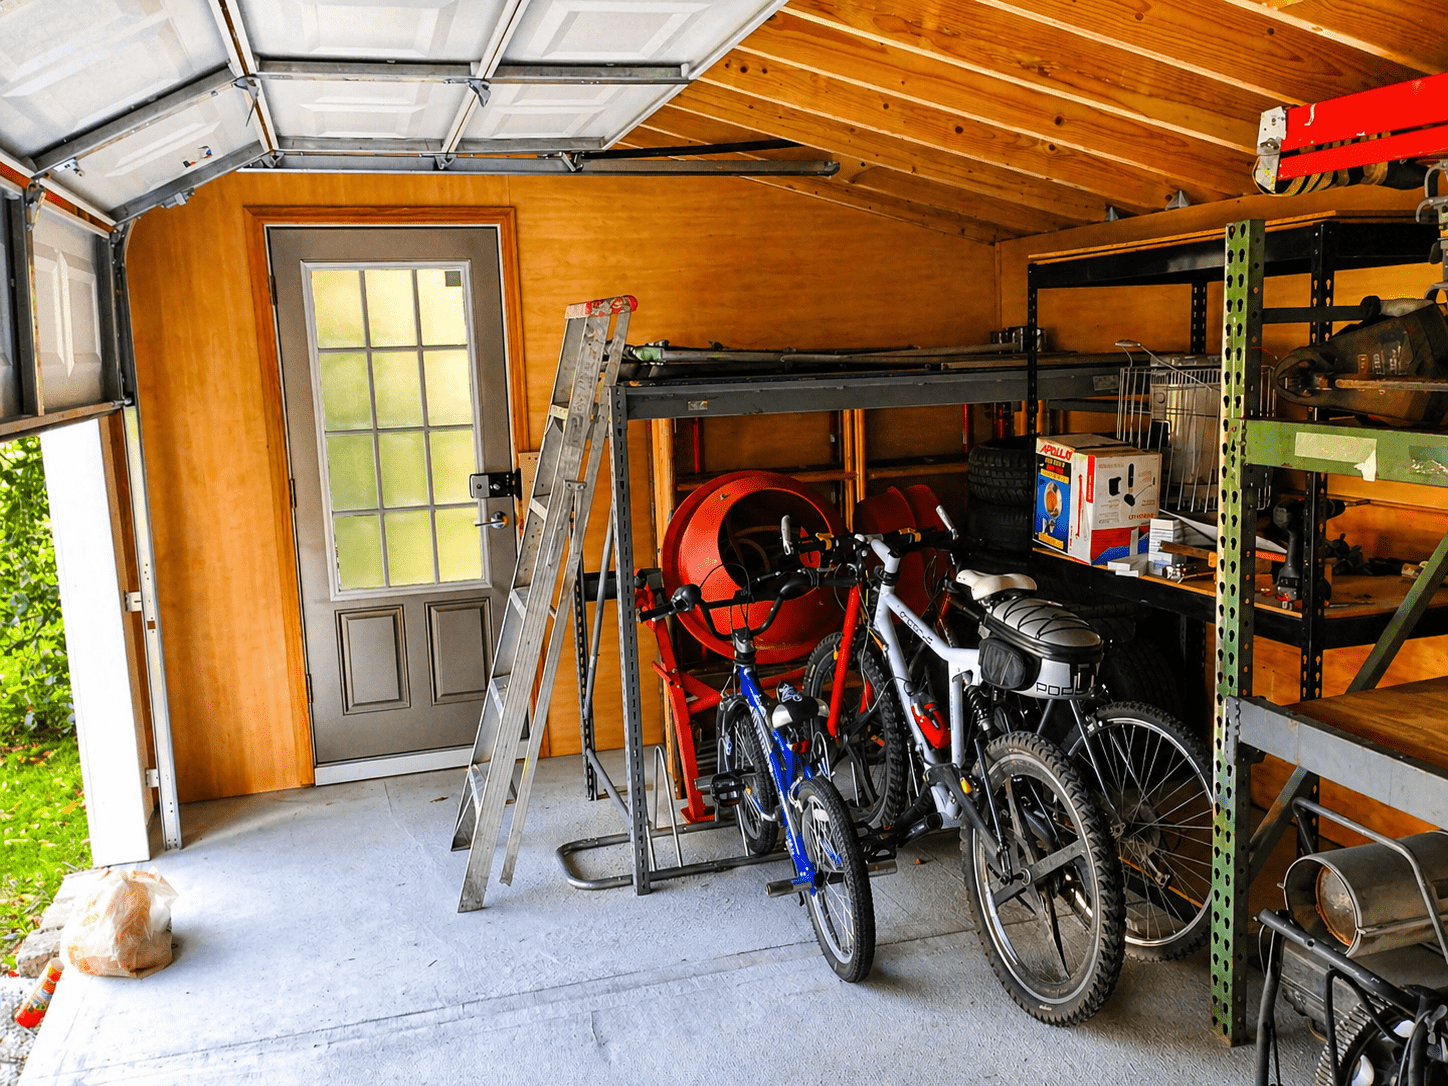
The end result: a modern-looking, permanent shed with plenty of daylight from the windows, garage doors that let our 54″ lawn tractor drive straight in and out, and a clean aesthetic that blends with our backyard.

We’re hoping this project inspires some homeowners to take on their own build. If we could pull it off after work and on weekends, so can you.
A note from 2026 — what I’ve built since
This was an early project we did about ten years ago. Since then, we’ve taken on a lot more — most notably a detached 6-car garage with unfinished space upstairs for a future apartment or studio — along with a number of larger projects that pushed me well beyond what I was doing here.
I’ll be writing about all of it in the coming months. If you found this post useful, bookmark Homeject and follow along — there’s a lot more coming on garages, workshops, modern outbuildings, and the kind of practical builds that make a property actually work for you.
You can also follow the day-to-day on:
- YouTube — full builds and walkthroughs
- Instagram — daily progress and behind-the-scenes
- Blog — detailed breakdowns and budget posts
More soon.
Frequently Asked Questions
How much does it cost to build a DIY storage shed?
This 2-car shed cost $5,500 ten years ago. At today’s lumber and Hardie panel prices, expect $8,000 to $9,000 for the same build. Sourcing from Facebook Marketplace, clearance aisles, and Menards 11% rebate sales is what kept it affordable.
Can one person build a storage shed alone?
Yes, with one exception — you need a second set of hands when raising the walls. Everything else (framing, sheathing, siding, roof, doors) is doable solo. Heavy-duty ratchet straps replace a helper for most other steps.
Do I need a building permit for a storage shed?
Depends on your municipality. Most jurisdictions require permits for any structure over 120 square feet (some use 100 or 200). Always check with your local building department before pouring concrete.
Why use Hardie panels instead of T1-11 or vinyl siding?
Hardie fiber-cement panels paired with Tamlyn aluminum reveals give you a modern architectural look that vinyl can’t match. Hardie also outlasts T1-11 plywood siding by decades and won’t rot, warp, or get eaten by woodpeckers.
How thick should a shed concrete pad be?
4 inches is standard for a 2-car shed pad. Below that you risk cracks under heavy loads. I built mine with 12–13 inches of compacted gravel base under 4 inches of concrete reinforced with rebar on 18–20 inch spacing.
What’s the cheapest way to side a shed?
T1-11 plywood siding is cheapest upfront ($30–40 per sheet) but rots in 10–15 years. Hardie panels from Facebook Marketplace cost about the same and last 50+ years. The Tamlyn reveals add $200–400 to the project but completely change the aesthetic.
How long does it take to build a 2-car storage shed?
30 days working solo, evenings and weekends, after a regular full-time job. With dedicated full-time work, the same build is doable in 10–14 days. The concrete cure time is the only step you can’t compress.
Related Homeject Posts
- 👉 The “All-Inclusive” Patio overview — the patio next to this shed
- 👉 How to Anchor Artificial Palm Trees in Planters — foam-and-brick method for outdoor planters
- 👉 Building the 6-car detached garage — coming soon
- 👉 Custom decorative concrete patio — coming soon